
How to setup Google Colaboratory to get free GPU and integrate with Google drive?

You can view my Colaboratory Notebook template with steps from here or you want to download this google colaboratory notebook template directly.
In one sentence, Google Colaboratory is an integration environment for the new learner of machine learning with GPU computational power.
This documentation is focus on some tips by my personal experience to share with others who just want to start their trials.
Table of content:
- Why do we need GPU?
- What is Google Colaboratory?
- How does it works?
- How can we create a Google Colaboratory notebook?
- How does it work with Google drive?
- Reference:
Why do we need GPU?
High dimensional computions are major operations in deep learning models.
Deep learning heavily rely on GPU to speed up high dimensional computations. You may only need 20 minutes to train a model with GPU but the same task may take 2 hours on pure CPU computing power.
What is Google Colaboratory?
Google Colaboratory is a free cloud service with GPU.
How does it works?
Please refer the above diagram.
When you (the client) execute google colaboratory (Which is a Python Jupyter notebook) from Google drive, Google will create a new virtual machine to host/execute your colaboratory notebook. There is an individual virtual machine to run each notebook.
That’s the reason why your notebook cannot read your data files which locate on Google drive. You have to upload your data file to the virtual machine directly or make a mount point to mount a specific folder on Google drive to the virtual machine as a local drive to access.
Pros
- The CPU / GPU resource is free. Currently, the environment provides one Tesla K80 GPU.
- The environment is well integrated with popular machine learning libraries.
Tensorflow, Keras, xgboost, numpy, pandas, scikit-learn, beautifulsoup, opencv-python …etc.
Cons (as of today)
- Limited resource.
a. Only around 12GB free Memory for you. In most of cases you will run out of memory in training a deep learning model with huge data set.
b. 50GB Hard drive space.
c. Provide one core of Intel(R) Xeon(R) CPU @ 2.30GHz.
- Connection time is limited for 12 hours.
You can use GPU as a back-end for 12 hours at a time. The connection will lost and Google will relaunch your notebook in a NEW virtual machine environment for next 12 hours. So all your data which stores in previous virtual machine is gone if you do not dump your model parameters into local and copy to Google driver.
- Unstable on the huge task
Sometimes, the notebook just dies during the training. There may be many underlying causes for this, but out of memory is the major reason in my cases.
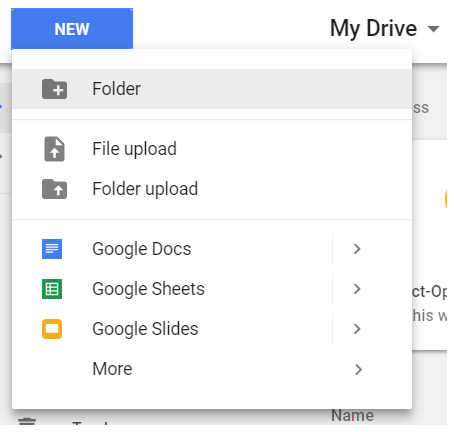
How can we create a Google Colaboratory notebook?
-
Let’s create a folder under Google drive, say ‘workspace’.
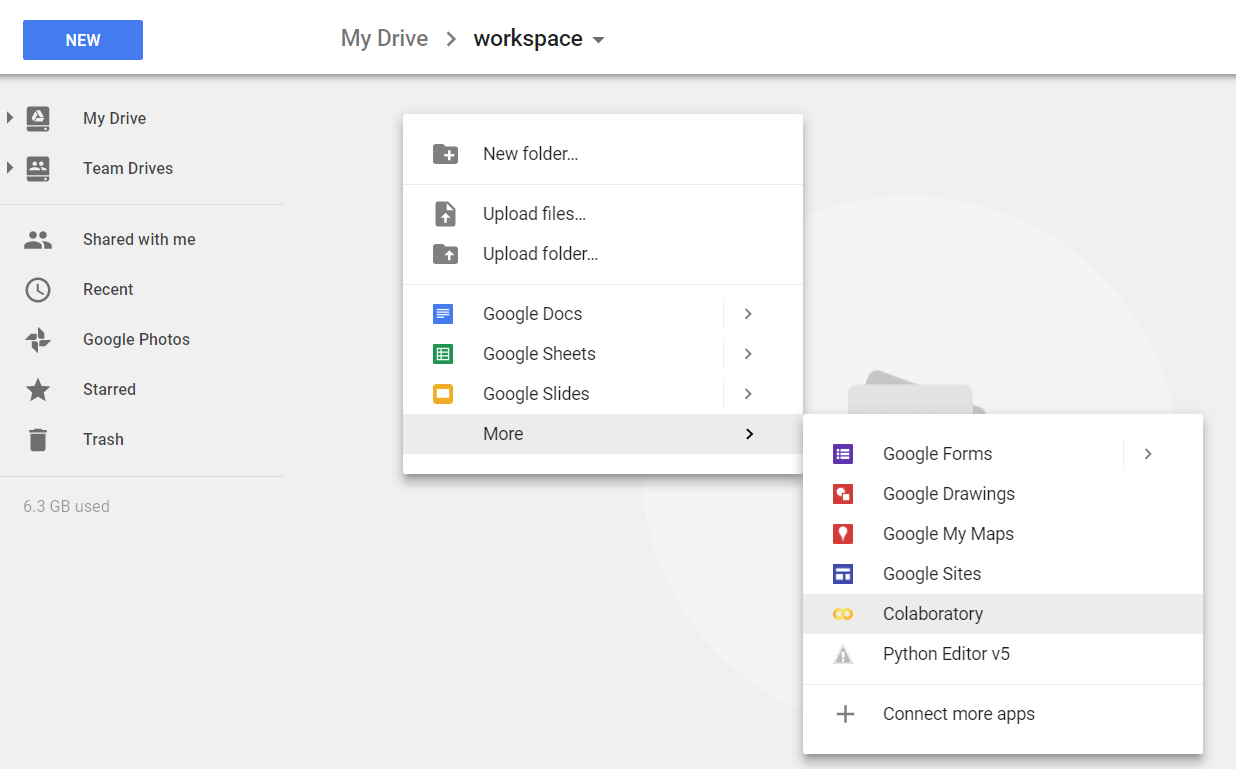
-
Change your current folder to ‘workspace’ which you just create. Now it’s time to create your Google Colaboratory by right click on the folder, then select ‘Colaboratory’.
-
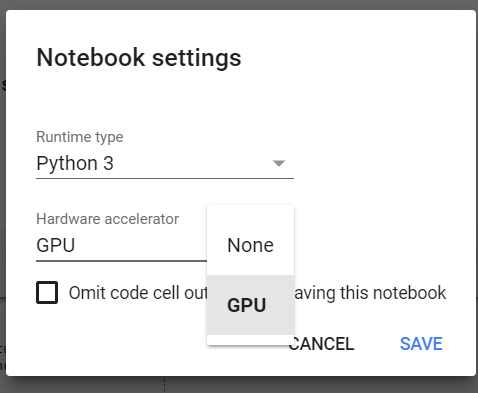
Enable GPU. Follow Edit > Notebook settings>Change runtime type (or Runtime > Change runtime type) then select GPU as Hardware accelerator.
How does it work with Google drive?
If you want to maximally leverage the benefit from the platform, you will need to create a local mount point folder on your virtual machine of the notebook and map the folder to a correspond folder on Google drive.
Here is the sample procedures.
- Download necessary software for authentication purpose.
- Create authentication tokens for Colaboratory and grant access privilege of Google drive to this session.
You need to grant “Google Could SDK” and notebook will leverage the SDK to access your “Google Drive”.
# Download necessary software
!apt-get install -y -qq software-properties-common python-software-properties module-init-tools
!add-apt-repository -y ppa:alessandro-strada/ppa 2>&1 > /dev/null
!apt-get update -qq 2>&1 > /dev/null
!apt-get -y install -qq google-drive-ocamlfuse fuse


# Generate auth tokens for Colab
from google.colab import auth
auth.authenticate_user()
# Generate creds for the Drive FUSE library.
from oauth2client.client import GoogleCredentials
creds = GoogleCredentials.get_application_default()
import getpass
!google-drive-ocamlfuse -headless -id={creds.client_id} -secret={creds.client_secret} < /dev/null 2>&1 | grep URL
vcode = getpass.getpass()
!echo {vcode} | google-drive-ocamlfuse -headless -id={creds.client_id} -secret={creds.client_secret}
At the end of result, you will need to click a link to launch a new page to get a token string, copy the string and paste into the blank field in the notebook, click enter and repeat the procedure again to grant second privilege.
Mount Google drive into virtual machine of Colaboratory.
Assume you create a folder “workspace” on your Google drive. Below script will create a /drive/workspace folder which is located on Google drive on your virtual machine of notebook, then copy all data files in workspace folder of Google drive to the home directory of virtual machine for your next tasks.
!mkdir -p drive
!google-drive-ocamlfuse -o nonempty drive
!pwd
!ls
!cd drive
!ls
import os
os.chdir("drive/workspace")
!ls
!cp -R * ../../
os.chdir("../../")
!ls -rlt
Please note you can use ‘!’+unix command on the virtual machine. Use os.chdir(“target_folder”) to actually switch your working directory to target_folder.
Save your model parameters into files.
Assume you create a model file by Keras which is a high level wrapper of tensorflow, you can save the model by below command.
I personally prefer to save the file onto virtual machine first, then copy the file to Google drive through the mound point folder. Of course you can directly save the model into “./drive/workspace/lstm_model.h5” but it may take longer time.
model.save("lstm_model.h5")
!cp lstm_model.h5 ./drive/workspace
Load your model parameters from local files.
from keras.models import load_model
!cp ./drive/workspace/lstm_model.h5 .
model = load_model("lstm_model.h5")
Copy multiple python objects from colaboratory to Google drive.
# Create two objects
userlist = ['userlist']
word_index = ['wordindex']

# Dump to virtual machine
pickle.dump((userlist, word_index), gzip.open("email_words_test.pkl", 'wb'))
# copy to google drive
!cp email_words_test.pkl ./drive/workspace
Load multiple python objects from Google drive.
!cp ./drive/workspace/email_words_test.pkl .
(userlist, word_index) = pickle.load(gzip.open("email_words_test.pkl", 'rb'))